
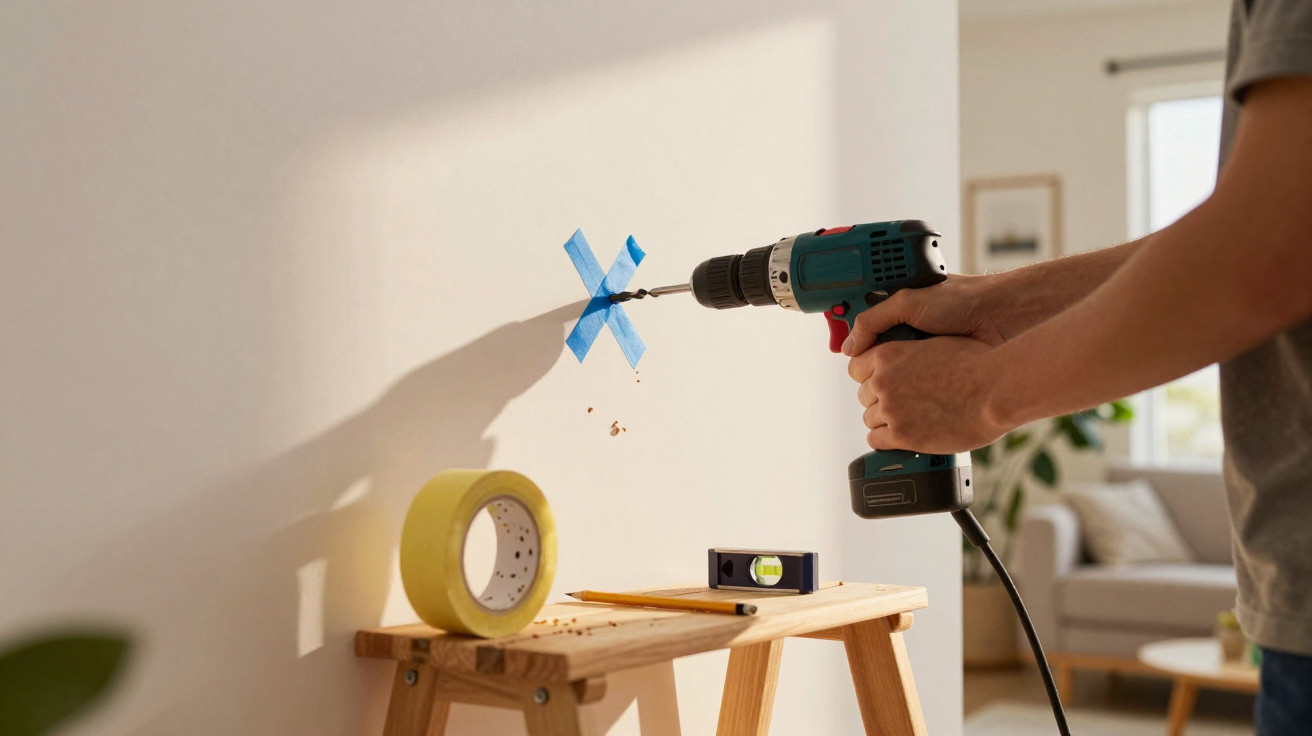
The tiles are already in place, the wall has just been painted, and only a shelf remains to be fixed. It is often at this exact point that DIY takes a tense turn: you measure twice, hesitate, then drill with that knot in your stomach, hoping the hole will not end up five millimetres too high. Tradespeople know the silence before the drill bites all too well, when one mistake can mean a wasted wall plug, a tub of filler and much of the afternoon gone. Their secret is not anything dramatic: they prepare the movement before reaching for the drill. A simple strip of masking tape, applied in the right place, can turn an imprecise hole into a neat, accurate fixing. It almost seems too straightforward. Yet it works.
Masking tape: the small detail that prevents major regrets
We have all experienced a pencil sliding across a smooth tile or glossy wall tile, leaving a mark that is too faint to be useful yet visible enough to irritate. Before marking the spot, a tradesperson will often stick two pieces of masking tape in a cross, making the surface instantly easier to mark, aim at and monitor.
On a bathroom job, this habit makes a genuine difference: a drill bit can skid in the first few seconds on porcelain stoneware, particularly when the drill starts at too high a speed. The tape provides a little grip and reduces that sudden movement which can leave a scratch around the hole - the small imperfection that, once the job is complete, is all you can see.
This tip works because it slows the process at precisely the right stage. It does not replace the correct drill bit or a secure fixing, but it gives the DIYer a stable starting point; that is exactly where a neat finish is won or lost. A successful hole begins long before the sound of the drill.
The tradespeople’s method: simple but rarely explained
Cut two strips of masking tape a few centimetres long and apply them in a cross over the area to be drilled. Mark the point in the middle, check the alignment with a spirit level, then begin drilling gently. If you are working on tiles or another delicate surface, do not use hammer action at first.
The most common mistake is pressing extremely hard to “get it done faster”. It is understandable: the drill bit seems to hesitate, so you apply more force. Clean drilling, however, mainly requires patience: use a moderate speed and take brief breaks so that the bit does not heat up unnecessarily. Let us be honest, nobody really does this every day, which is all the more reason to allow yourself an extra thirty seconds.
Masking tape can also be used to set the drilling depth: wrap a small piece around the bit at the desired length to create an easy visual guide.
“The right tool does not correct a rushed movement; it helps the person who has prepared it.”
- Use a low-tack tape so that it does not pull away paint.
- Select a drill bit suited to the material, rather than choosing solely by the wall plug diameter.
- Remove the tape slowly once drilling is complete to protect the finish.
A habit that changes DIY at home
This modest technique points to something broader about work done well: professionals do not always look for the most expensive tool; above all, they aim to reduce risks before they arise. A roll of tape costing a few pounds can protect a splashback, keep a shelf level and prevent that unpleasant feeling of having ruined a wall over a minor detail.
It is useful in many other situations too: marking a cut on furniture, holding a template in position, identifying the screws for a frame or protecting a freshly painted area. DIY becomes less daunting when you are willing to prepare, measure and then check again. Precision is not reserved for professionals.
Next time a drill is waiting on the floor and the wall suddenly seems far too precious to drill into, masking tape may deserve to be the first tool you pick up. It is not a magic formula, merely a discreet habit that leaves more room for the satisfaction of seeing an object sit straight and neatly in place, as though it had always belonged there.
| Key point | Detail | Added value for the reader |
|---|---|---|
| Create a grip area | Apply masking tape in a cross before marking | Reduces the risk of the drill bit slipping on smooth surfaces |
| Mark accurately | Draw directly on the tape rather than on tiles or paint | Provides a visible mark that is easy to remove |
| Control depth | Place a tape marker around the drill bit | Prevents drilling too far into the wall |



Comments
No comments yet. Be the first to comment!
Leave a Comment