
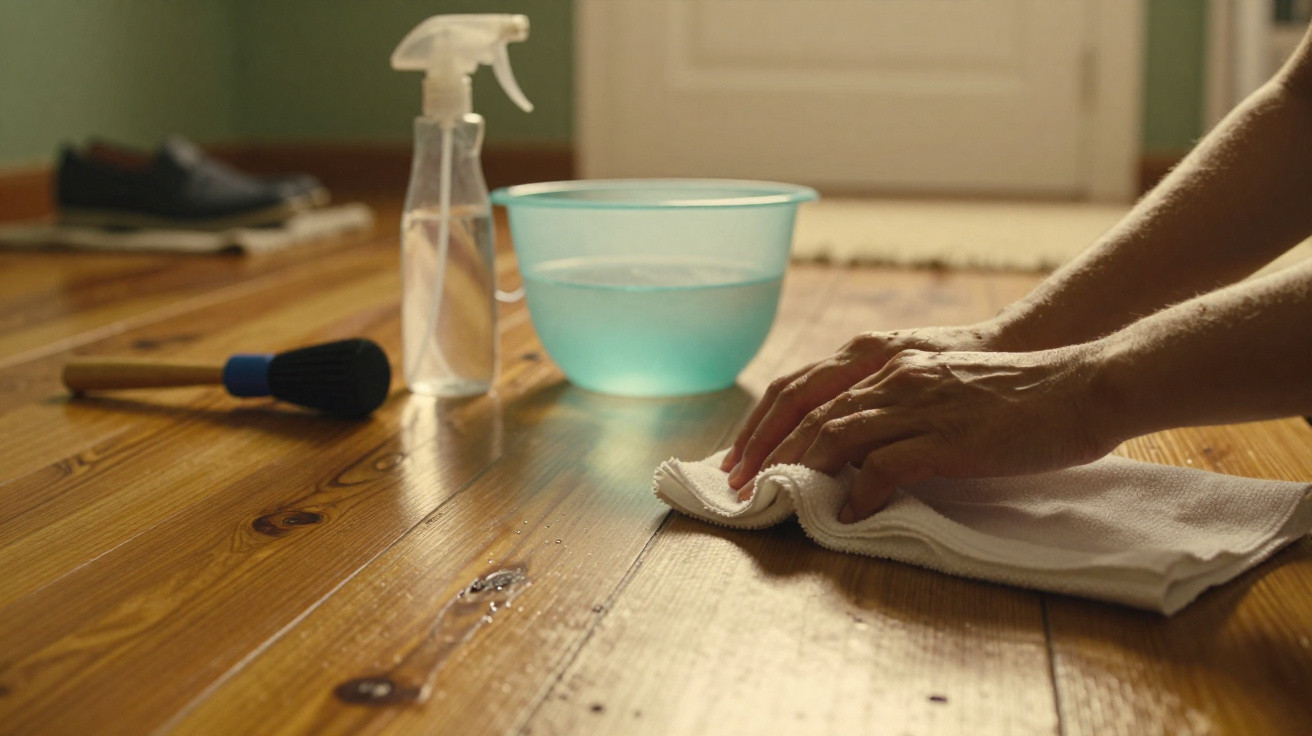
The first thing that catches your eye is not the wood’s colour but its lacklustre look.
There is a hazy grey layer stealing the sheen, a tacky strip where the sofa once stood, and an area beside the sink that simply looks… worn out. You rub it with your sock, partly intrigued and partly irritated, and the grime gathers into a tiny roll. It is revolting, yet strangely gratifying.
On a sunny morning, that film can feel almost insulting. You invested in a quality hardwood floor, perhaps even debated oak versus walnut or satin versus gloss. Now you are looking at streaks and fine scratches that appear to multiply every week, mop in one hand and phone in the other as you search for what went wrong.
That is when one quiet but essential question arises: how can you clean hardwood so that it looks vibrant again… without gradually ruining its finish?
What your hardwood floor is really up against
Most hardwood floors are not ruined by one spectacular mishap. Instead, they deteriorate gradually beneath layers of detergent residue, abrasive grit and well-intentioned cleaning habits. What appears to be “dirt” is often a mixture of dust, skin, cooking grease and old cleaning product that did not fully evaporate.
Every footstep over that layer acts like extremely fine sandpaper. You may not notice it after a week, or even after a year, but the finish becomes thinner, more scratched and less reflective. Eventually, the traffic routes become visible: a dull trail between the kitchen and sofa, with brighter margins beneath furniture.
This is more than an appearance problem. When the protective coating is damaged, the timber below starts absorbing spills, humidity and ordinary household wear in ways it was not designed to handle.
On a hectic weekday evening, consider what happens in a typical hardwood-floored kitchen. Someone cooks a fry-up, a light spray of grease rises into the air and then settles invisibly on the boards. Children walk through with crumbs attached to their socks. With every enthusiastic arrival, the dog brings in a scattering of grit.
You deal with a spill using whatever is nearest: kitchen roll, a washing-up sponge or the old T-shirt now assigned to “cleaning cloth” duty. The area appears fine, but a faint detergent ring remains and combines with the unseen grease layer. A few months later, that spot feels sticky however frequently you mop it.
Research into household dust shows that it is not simply “dirt”: it combines textile fibres, outdoor debris, skin cells and cooking residue. This material adheres particularly well to the microscopic texture of a worn coating. That is why older floors can seem to collect grime increasingly quickly.
The principle behind thorough cleaning is straightforward: work with the floor finish rather than against it. Modern hardwood consists of more than timber; it is timber protected by a system such as polyurethane, oil, wax or factory UV-cured coatings. Water, pH and friction affect each one differently.
Powerful alkaline cleaners may cut through accumulated dirt quickly, but they can also erode the finish and make it more porous. Excess water can work between boards, causing edges to swell and lifting the coating from underneath. Even an unsuitable microfibre pad may hold sharp grit and become an unnoticed scratching tool.
Proper protection means choosing a method suited to the finish, applying enough liquid to release soil without saturating the timber, and removing residue rather than merely spreading it around. Clean does not only mean “dust-free”. A clean floor is one whose protective layer can continue to do its job.
Daily and weekly habits that protect your finish
The most effective protective cleaning habit is far from glamorous: dry dusting. A soft, high-quality microfibre pad or broad dust mop passed over the surface can remove up to 80–90% of the grit that scratches a finish. Spending two minutes on the hallway can preserve the coating for years.
Treat it like brushing your teeth. It is not a major task, but a small repeated habit that prevents meaningful damage from accumulating. On busy routes - from the entrance to the living room, or from the kitchen to the table - a quick pass daily or every other day can transform how your floor fares.
Next, once or twice each week, use a damp clean with a pH-neutral hardwood cleaner. There should be no soaking and no steam: simply use a lightly misted pad to collect what dry dusting leaves behind.
One rainy Sunday, a homeowner in Ohio carried out an experiment. She cleaned one half of her living room in “the usual way” - using a bucket, hot water and a generous amount of multi-surface cleaner - while using a dedicated hardwood spray and flat mop on the other. She photographed both sections each month for a year.
The “bucket side” gradually became duller and more streaky. In subdued light, swipe marks were visible where the mop had spread diluted detergent. Shoes made a slight squeaking sound on humid days. On the “spray side”, the sheen remained more consistent, while spills wiped up more easily instead of smearing.
A flooring contractor who records callbacks offers another revealing example. He estimates that 6 out of 10 complaints saying “my finish is failing” are actually caused by a build-up of cleaning residue. One deep clean using the correct neutral product and a new microfibre pad can suddenly “restore” the floor - without any sanding.
There is a clear explanation for these contrasting results. Many general-purpose products are made to leave a microscopic coating that makes a surface feel smooth and appear glossy. On sealed hardwood, this layer catches dust and oils from shoes, eventually becoming a sticky grey film. In contrast, neutral hardwood cleaners are intended to lift soil and evaporate without leaving residue.
Water has two roles, too. Use too little and the dirt does not loosen, it merely smears. Use too much and it penetrates joints, travelling beneath the finish where it cannot be wiped away. The ideal balance is a gently damp pad that dries within a minute or two while you work across the room.
It makes sense in theory, but in real homes, the gap between “gently damp” and “oops, I have just sloshed the bucket” is where much finish damage quietly starts.
Deep cleaning hardwood floors without sacrificing their future
For persistent residue - grey traffic lanes or the permanently tacky patch in front of the fridge - a planned deep clean can refresh the whole floor. Begin by vacuuming on the hard-floor setting, ensuring the beater bar does not strike the finish. Clean the corners, beneath skirting boards and along rug edges.
After that, use a specialist hardwood floor cleaner with a fresh, clean microfibre pad. Tackle small sections at a time, lightly misting either the boards or the pad and never flooding the surface. Wipe in the direction of the grain so that any faint streaking blends naturally.
Replace the pad if it becomes dirty quickly. Moving a filthy pad around is like washing your face with a dirty dishcloth - it may feel like cleaning, but it mostly transfers grime from place to place.
In practice, the worst cleaning mistakes usually result from good intentions combined with rushing. People choose whatever is already in the cupboard: vinegar, a steam mop, washing-up liquid or a “shine restorer” promising miracles in a single pass. The immediate result can feel oddly satisfying, while the longer-term outcome is a cloudy, slippery surface that never looks genuinely clean.
During a difficult week, you may have tried every one of them. A little vinegar to tackle grease, followed by a “polish” to revive the gloss, then a steam mop because the polish felt tacky. Every added layer makes the next problem harder, trapping dirt and putting pressure on the finish. At a microscopic level, the film becomes rougher rather than smoother.
At a human level, it is simply exasperating. The more you clean, the worse the floor seems to look. Frankly, this is the point at which many people begin considering a complete refinishing job they do not actually require.
“I used to think my floors were worn out,” says Mark, a Brooklyn apartment owner who was quoted $4,000 for sanding and refinishing. “Turned out they were just buried under years of the wrong cleaners. One long afternoon with the right stuff and fresh pads, and I got my floor back without the dust and drama.”
Before letting any product near your hardwood, run through this simple checklist:
- Is it labelled as safe for my particular floor finish (poly, oil, waxed, factory pre-finished)?
- Does it promise “shine” or “polish”, or is its focus on “cleaning” and “residue-free”?
- Will it evaporate quickly, or leave behind a film requiring buffing?
- Am I using it because it is convenient… or because it truly suits my floor’s needs?
Let us be honest: nobody really does this every day. Even so, spending ten seconds on these questions every few months can prevent the gradual clouding that makes beautiful hardwood seem permanently tired.
A hardwood floor that matures well rather than merely gets old
A clean hardwood floor has something unexpectedly grounding about it. Light travels across it in a different way. You hear the gentle tap of footsteps rather than the muffled sound of grit and film. The room feels complete, even if a laundry basket is reproaching you from the corner.
A sound maintenance routine does not need to be strict. Some weeks, life takes over: the dog sheds, the children spill things, and you simply wipe the worst areas before moving on. That is perfectly fine. The aim is not perfection, but avoiding the kind of neglect that leads to drastic and costly repairs later.
Sharing how you genuinely clean - the products that failed, the quietly effective tricks and the “never again” experiments - can help others avoid the same pitfalls. Hardwood is not delicate; it simply reflects how it has been treated over the years. A floor can withstand daily chaos and still mature gracefully when the cleaning routine beneath it is the right one.
| Key point | Details | Why it matters to readers |
|---|---|---|
| Match cleaner to finish type | Choose pH-neutral cleaners specifically labelled for polyurethane, oil or wax finishes. Factory pre-finished floors often require residue-free sprays approved by the manufacturer. | This lowers the chance of clouding, peeling or softening the top coat, helping avoid costly refinishing years before it should be necessary. |
| Control moisture, don’t soak | Use a lightly damp microfibre pad that dries within 1–2 minutes. Avoid buckets of water and steam mops on sealed hardwood. | It prevents cupping, swollen edges and hidden water damage between boards while still releasing stubborn grime. |
| Prioritize grit removal | Vacuum using hard-floor mode and dry dust busy routes before any damp cleaning. Concentrate on entrances, kitchen walkways and pets’ favourite spots. | This removes the tiny particles responsible for micro-scratches, keeping the finish smoother and easier to clean over time. |
FAQ
How often should I deep clean my hardwood floors? For most busy homes, a proper deep clean every 2–3 months is sufficient: vacuum thoroughly, then make a careful pass with a hardwood-specific cleaner and fresh pads. In low-traffic rooms, doing this twice a year will usually work without damaging the finish.
Is vinegar and water really bad for hardwood? Ordinary vinegar is acidic and can gradually etch many finishes, especially when it is used frequently or in strong solutions. Using it once in a rare emergency will not ruin your floor, but as a routine cleaner it can dull the sheen and may invalidate certain warranties.
Can I use a steam mop on sealed hardwood? Most flooring manufacturers recommend against it. Intense heat and forced moisture can drive steam into joints and beneath the finish, causing peeling, cloudy areas and warped boards that are difficult to repair without sanding.
What kind of vacuum is safe for hardwood floors? Choose a model with a hard-floor or “bare floor” setting that switches off the beater bar, along with soft rubber wheels. A straightforward cylinder vacuum with a dedicated parquet head works remarkably well and will not damage the coating.
How do I tell if my floor has cleaner buildup or real finish damage? Select a small, inconspicuous area and clean it carefully with a residue-free hardwood cleaner and a fresh microfibre pad, replacing the pad if it turns grey quickly. If the test area appears clearer and more even, you are probably dealing with build-up; if it remains patchy or worn, the finish itself may be thinning.
Are “shine” or “polish” products safe to use regularly? They are closer to temporary cosmetics than proper cleaners. Used sparingly and correctly, they can increase gloss, but regular application tends to cause uneven shine, sticky patches and future adhesion issues if professional refinishing is ever needed.





Comments
No comments yet. Be the first to comment!
Leave a Comment