
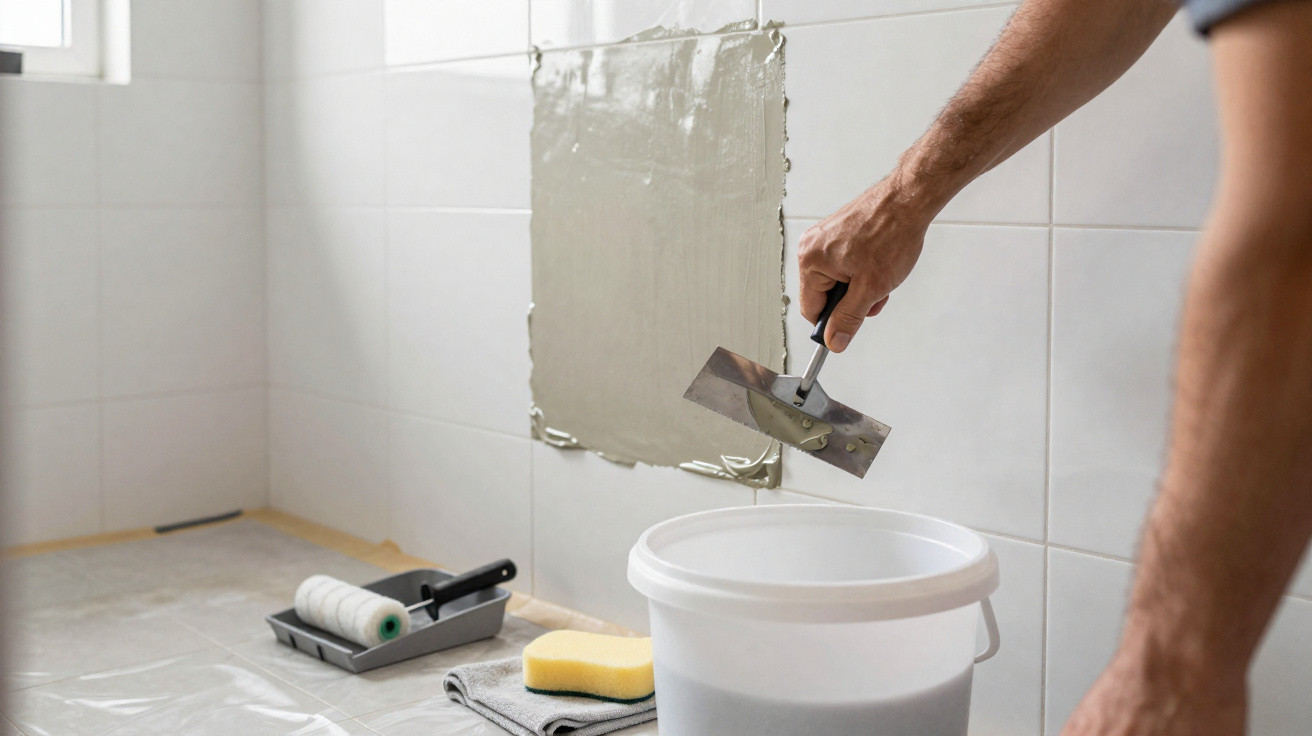
Transforming old tiles without dealing with the usual demolition mess has become a practical choice in residential decoration. Applying microcement over ceramic surfaces delivers a complete visual update, speeding up the schedule and saving resources by removing the daily building-work nuisance of rubble.
Why apply microcement directly over tiles?
Covering dated wall finishes with a seamless layer avoids the labour-intensive stages of major demolition. The existing substrate remains securely in place while the specialist compound bonds effectively, producing a refined look that enhances a modern bathroom without requiring the complete removal of ceramic tiles.
This method also eliminates the need to dispose of large volumes of broken materials, helping the renovation reach completion sooner. What is more, the lack of grout lines prevents unwanted dirt build-up, delivering a minimalist aesthetic that is particularly easy to maintain in everyday family life.
What material can make a home look sophisticated at very little cost?
Is there a modern, affordable finish that completely transforms walls? The real secret to its durability depends on… Read more
How should ceramic surfaces be prepared before application?
Successful bonding begins with thorough cleaning of every tile in the room. Any trace of grease, moisture or soap can compromise adhesion, so deep cleaning is essential to ensure the coating can receive its preparatory layers without the risk of future detachment.
Once the tiles have been degreased, a bonding primer is applied together with flexible reinforcing mesh. This crucial stage levels the old tile joints, providing mechanical stability and preventing unwanted cracks from appearing in the new decorative layer that will cover the wall.
Below is a video from the CimentArt YouTube channel that explores the points discussed in this topic in greater depth:
Which steps ensure correct microcement application?
Application starts with a levelling base spread evenly over the protective mesh. Working with millimetre-thin layers and suitable tools ensures the surface is perfectly level, creating the support needed for the fine coats that form the seamless visual finish.
After the base has dried, it is lightly sanded to remove minor imperfections before the fine coat is applied. This stage determines the room’s smooth texture and requires precision when handling the trowel to establish an elegant, uniform finish in the renovated space.
Essential application kit
Essential materials
These items ensure the coating is fixed correctly:
- Adhesion primer for fixing over ceramic tiles;
- Fibreglass mesh to prevent cracks and fissures;
- Two-component polyurethane waterproofing sealant.
Why is waterproofing essential in wet areas?
Because a bathroom is exposed to constant steam and direct contact with water, sealing is mandatory. Acrylic sealer penetrates the compound’s micropores, providing initial protection against staining and creating adhesion for the wall’s final protective varnish.
Applying two-component polyurethane creates a fully waterproof shield over the treated surface. This coating stops excessive moisture from passing through, offering strong resistance to daily wear and preserving the structure’s integrity for many consecutive years.
The following list outlines the main benefits of applying this waterproof protection:
- Complete protection against water ingress in areas frequently exposed to water;
- Simple daily cleaning without a risk of material deterioration;
- Long-lasting preservation of the original shades and decorative appearance.
How can the new finish be kept looking immaculate?
Routine cleaning of microcement requires only water, mild soap and soft cloths. Avoiding harsh chemicals and abrasive sponges protects the sealing layer, extending the finish’s useful life and maintaining the surfaces’ natural shine for decades.
Following straightforward preventative care ensures the renovated bathroom retains its appearance without extra effort. This uncomplicated routine safeguards the investment, ensuring a modern, impeccable look that enhances the entire property throughout its lifetime of use.



Comments
No comments yet. Be the first to comment!
Leave a Comment