
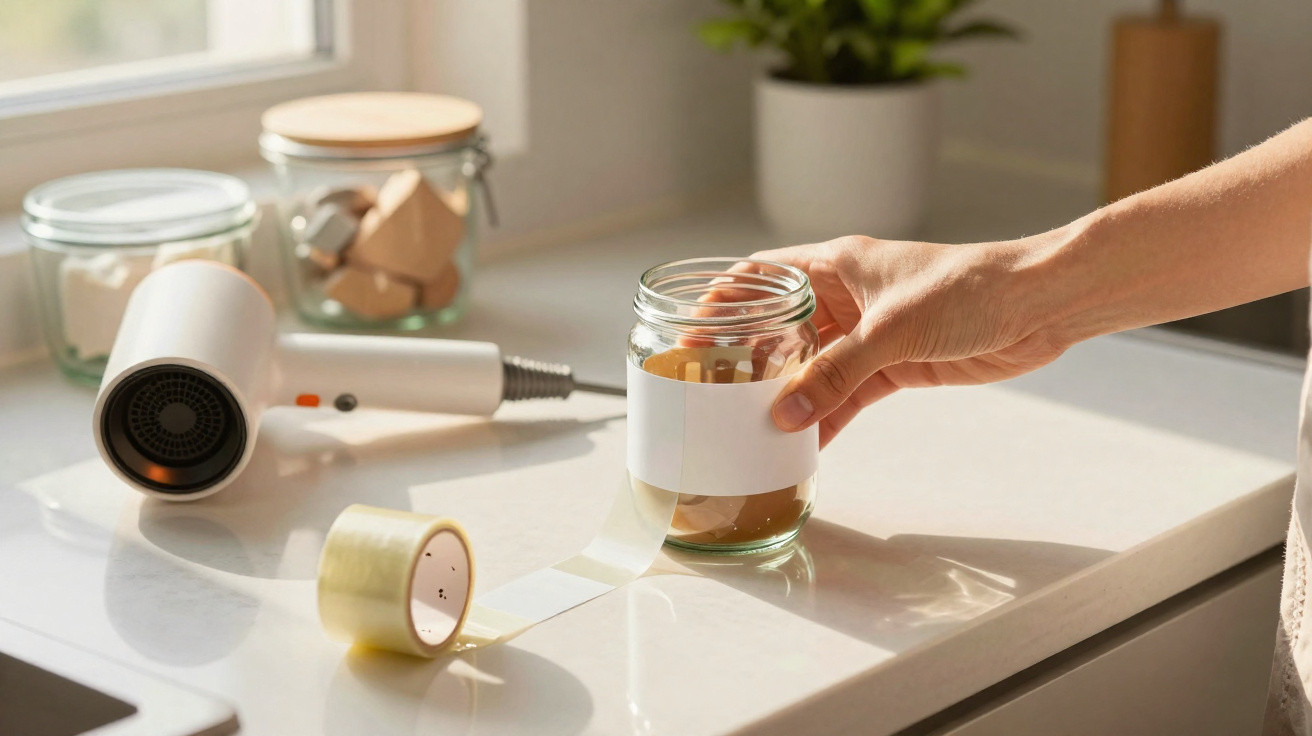
Many people resort to scraping irritably with a fingernail, rubbing with a tea towel or, in frustration, even reaching for a knife. The result is a scratched surface that is still sticky – and a ruined mood. Yet a straightforward pairing of two items from a drawer is enough to remove even stubborn stickers in seconds.
Why a fingernail nearly always loses against labels
The instinct is obvious: catch a corner and start scraping. Although this may feel controlled, it is actually one of the worst approaches for many surfaces.
- It can work on glass, but it often leaves streaks behind.
- On stainless steel, it may cause fine scratches that show clearly in the light.
- Plastic and painted surfaces can quickly develop a dull patch.
A fingernail acts like a tiny, uneven scraper. It tears away the paper bit by bit, spreads the adhesive around and creates precisely what nobody wants: a smeary, slightly grey residue that attracts dust.
There is another issue: many manufacturers use particularly tough adhesives, and these change over time:
- Heat – for instance in a car, on a windowsill or beside a radiator – effectively bakes the adhesive into place.
- Older labels either become rock-hard or take on a rubbery texture.
- On textured plastic, adhesive settles into the tiny pores.
- On cardboard and paper, it penetrates deep into the fibres.
“The crucial factor is not more pressure, but the right combination of adhesion and heat.”
The clever drawer duo: sticky tape plus a hairdryer
Rather than fighting the adhesive, this smart technique puts it to use. The idea is to give it something it would rather stick to than the label itself.
How sticky tape does the hard work
Place ordinary sticky tape – ideally fairly wide parcel tape – over the entire label and press it down. The tape covers the paper and bonds with the printed surface.
This has two effects:
- The pulling force is spread across the whole area instead of tearing at one tiny corner.
- The paper remains more stable and is more likely to come away in one piece.
The more firmly the tape is pressed down, the more grip points it has. This creates a stable layer of label and tape that is much easier to peel away.
Heat from the hairdryer softens the adhesive
The hairdryer provides the second part of the method. A few seconds of warm air are generally enough to soften the adhesive and reduce its holding power.
The key point is that the heat targets the adhesive without damaging the surface. Unlike boiling water or a knife, a hairdryer can be controlled far more accurately.
“Sticky tape provides the grip, while the hairdryer reduces the adhesive strength – so the label practically comes away by itself.”
Step by step: a clean surface in 30 seconds
Once you have learned the process, it soon becomes something you do almost without thinking. Here is the quick guide:
- Apply the sticky tape: Cover the label completely with tape. If it is large, use several strips with a slight overlap.
- Press it down firmly: Smooth from the centre outwards with your fingers or a clean cloth so that the tape makes contact everywhere.
- Warm it: Set the hairdryer to medium heat, hold it around 15–20 centimetres away and warm the area evenly for a few seconds.
- Peel it away flat: Pull the tape off in one calm, steady motion, keeping it as flat and nearly parallel to the surface as possible.
The angle is important: the flatter you pull, the more likely the label is to come away in one piece. Pulling sharply upwards makes it more likely to tear.
Speed matters too. A sudden tug can cause tears, while moving too slowly may allow the adhesive to stick again. A calm, consistent pull usually works best – rather like removing a plaster deliberately but without rushing.
How the sticky tape and hairdryer method works on different materials
Glass and ceramic: the ideal application
The tape-and-hairdryer combination works especially well on glass and ceramic. These surfaces are smooth, heat-resistant and fairly forgiving.
- Treat the label while it is dry; do not soak it first.
- Warm it only briefly, as a few seconds are usually enough.
- After removal, clean the area with warm washing-up water.
This is particularly worthwhile for preserving jars and attractive bottles: after the process, they look as good as new and are ideal for reusing.
Plastic and stainless steel: take care with temperature
With plastic, it is worth checking the type of surface first. Thin or inexpensive plastics can warp slightly if exposed to air that is too hot. Therefore:
- Hold the hairdryer a little further away.
- Use several short bursts of heat rather than one very long application.
- Test how the material reacts in an inconspicuous area first.
Stainless steel tolerates heat without difficulty, but is susceptible to scratches. This is exactly where the sticky tape and hairdryer method is useful, as it avoids blades, pan scourers and abrasive sponges.
Cardboard, paper and lacquered wood: proceed gently
Delicate materials, such as packaging cardboard, book covers and lacquered furniture, need a more careful approach. Too much heat or tape with excessively strong adhesion can pull away fibres or lift the lacquer.
A practical trick is to stick the tape to a clean kitchen towel once, then peel it off again. This slightly reduces its adhesive strength, making it gentler to use.
Then use the hairdryer briefly and on low heat, pull very flat and keep checking whether any material is lifting. It is better to repeat the process than to ruin an area.
What to do about adhesive residue, streaks and odour
Occasionally, a light adhesive film remains despite using this method. There is no need for harsh chemicals.
“Brief heat, a fresh piece of sticky tape, press it down again, then peel it off flat – this removes the final residue.”
If you want to clean the surface further, choose the method according to the material:
- Glass, ceramic: Warm water with a little washing-up liquid is nearly always sufficient.
- Stainless steel: Use a soft cloth with a small amount of household alcohol, then wipe with water afterwards.
- Plastic: Test first in an inconspicuous spot to check whether alcohol affects the surface. When in doubt, use washing-up liquid only.
- Very stubborn, greasy adhesive: A tiny drop of cooking oil loosens adhesive residue; then remove it thoroughly with washing-up liquid so that no greasy film remains.
The important thing is not to rub dry with pressure, as this rolls the adhesive into rubbery little balls and makes it even harder to remove.
Why the small effort is genuinely worthwhile
Removing labels cleanly brings several everyday benefits:
- Jars, bottles and tins can be reused for dry goods and homemade items.
- Gifts look more high-quality when no half-removed stickers are visible.
- Kitchen and bathroom accessories retain a cared-for appearance for longer.
Many people throw away high-quality containers simply because they are annoyed by the adhesive. With the sticky tape and hairdryer technique, they can go into the store cupboard or craft shelf instead.
Practical extra tips for everyday use
If you often buy labelled products, it is useful to keep a small removal kit in a drawer:
- A roll of wide parcel tape
- A hairdryer within easy reach
- A soft microfibre cloth
- A small bottle of household alcohol for robust surfaces
It also helps to remove new labels as soon as possible. Fresh adhesive releases more easily before sunlight, time and temperature changes have effectively baked it on.
There is an additional advantage for craft and organising enthusiasts: after old labels have been removed neatly, you can apply your own labels – for example, using a label maker or removable stickers. This keeps the kitchen tidy while ensuring nothing has to go into the glass recycling bin simply because the original label was irritating.
Comments
No comments yet. Be the first to comment!
Leave a Comment